1

Crustless Zucchini Blossom Quiche

Looking for a low carb quiche? This crustless quiche is so delicious, creamy, and loaded with vegetables, and topped with zucchini blossoms and dollops of herbed ricotta.

This quiche is delicious…it can be served for brunch or any meal…

– How I came up with this recipe?

This recipe was created because I wanted to use up the zucchini blossoms and the leftover herbed ricotta used in Air Fried Zucchini Blossom with Ricotta and Mozzarella Cheese recipe. The good thing is that I was able to use them all in one recipe.

– Why this quiche is so easy to make.

First, because there is no crust, so you will not have to hustle in making the dough, which can be time consuming.

Second, just layer all the ingredients into a deep dish, steam and you are ready to serve the most beautiful and delicious quiche.

– What substitutions can I make?

Of course, substitutions are allowed…instead of spinach you can add zucchini, mushrooms, bell peppers, and so on, just make sure to sauté before to remove the excess of water from the vegetables.

– Like it richer?

Yes, substitute milk with heavy cream, or half and half…you make the decision.

– Are you ready to try this recipe out?

Ingredients:

  • 3 extra-large or jumbo eggs
  • ¼ onion chopped
  • Handful of spinach leaves
  • Cherry tomatoes, cut into half
  • Milk (double measurement from the eggs)
  • Zucchini blossoms (6-7)
  • Herbed ricotta, recipe HERE
  • Fresh thyme to taste
  • Salt and pepper to taste
  • Olive oil

Method:

In a small frying pan, sauté onion and spinach. Add salt and pepper to taste. Set aside once the spinach is wilted.

Beat the eggs and pass through a sieve into a measuring cup.  Take a mental note of the volume.

In another measuring cup pour milk, double of egg volume. For instance, if the volume of the eggs is 120 ml, use 240 ml of milk.

Mix the milk and egg together. Add salt and pepper to taste and set aside.

Coat a deep dish of approximately 21 cm (8 ½ inches) with butter.

Spread evenly the sauté spinach with onion. Gently pour the egg and milk mixture into the dish.

Topped with sliced cherry tomatoes, thyme, zucchini blossoms and finalize with dollops of herbed ricotta.

Steam under high heat for 4 minutes. Turn the heat off and let it sit for 14 minutes covered.

Serve hot.

– If you enjoy this simple and easy recipe, you might want to look at these…

Thank you for visiting Color Your Recipes…have a colorful week!


Simple Apple Crostata

This is a super easy version of apple pie, each slice of this crostata is packed with everything you find in an apple pie…the apple is moist and the crust is light and flaky…and even better served with a scoop of vanilla ice cream.

A few weeks ago, I was asked to make a dessert with apple for a dinner, after thinking and surfing the internet for ideas I finally decided to go with an apple crostata, first because of the way it looked and second for its simplicity.

So, if you like apple pie, you will love the apple crostata, which is nothing more than an apple tart. For this apple crostata, I simply used all the ingredients as for to bake an apple pie…and yes, I cheated…I did not make the crust, came directly from Trader Joe’s freezer, but if you like making everything from scratch you have my respect…either way, I can guarantee that you will enjoy this recipe, especially with a scoop of vanilla ice cream.

Talking about ice cream, have you ever heard of Handel’s Homemade Ice Cream? Well, if not you should see if there is any near you…the ice cream is to die for, made daily with the most fresh ingredients, once you try their ice cream you will not be able to settle for any other….anyway, so this is what we took to the dinner party.

This recipe was a compilation of many recipes from the internet, particularly from here.

Ingredients:

  • 500 g of apple, I used organic pink lady
  • 4 tablespoons sugar
  • 1 tablespoon of cornstarch
  • 2 teaspoons ground cinnamon
  • 2 tablespoons of lemon juice, about the juice of one medium lemon
  • 3 tablespoons of butter, melted
  • 1 beaten egg mix with ½ tablespoon water as egg wash
  • Swedish pearl sugar
  • Extra ground cinnamon for the crust

Method:

Make sure the crust is defrosted, according to the instruction of the package.

Preheat oven to 400F

In a small bowl mix the sugar, cinnamon, cornstarch and set aside.

Peel, core and slice the apples. Place in a medium bowl. Add the lemon juice and toss it gently, making sure that every apple slice is coated with the lemon juice. Add the cinnamon and sugar mixture and then the melted butter. Again, making sure that the apple slices are coated.

Peel the pie crust and place on a parchment paper. Layer the apple slice orderly in one direction, leaving about 1 to 1.2 inch from the edge.  Once the crust is filled with the apple, fold the edge over the apple.

Brush the border with the egg wash and sprinkle with cinnamon and Swedish pearl sugar.

Bake for approximately 35 – 40 minutes or until the golden on the top.

Remove the crostata from the oven and let it cool before serving.

Note: I made another version which a thin layer of low sugar apricot jam (2 tablespoons) was added to the crust before adding the slices of apple, and proceeded as described above…absolutely delicious!

I hope you enjoy this simple version of apple pie.  You might want to take a look at Simple Apple Crisp or Apple Filled Buns recipes.

Did you know that apples contain pectin? Pectin is used in the making of jam as a thickening agent. Moreover, pectin is a dietary soluble fiber which can help lower cholesterol.

Thank you for visiting Color Your Recipes…have a colorful week!


Pearl Meatballs

These is a simple recipe for meatballs covered with a layer of glutinous rice. The combination of texture is just magical…

Have you ever missed food that you used to eat when little? When living in Brazil my mom used to make these meatballs covered with a layer of glutinous rice, aka sticky rice. Since I am a big fan of anything “glutinous” it is not surprise that this would be one of my favorite dishes. Now, don’t ask me why pearl, as from my understanding pearl should be smooth and elegant and the look of this so called “pearl meatballs” do not resemble in any way or shape (maybe the shape being round) of a pearl…to me personally they look more like an albino porcupine…with the glutinous rice going in every possible direction.

Regardless of the shape and name, the combination of the juicy meatball with the sticky rice is just amazing…you will not believe how tasty and detectable this combination is until you try it. I must admit that mine did not come out as nice looking as I remember my mom’s…but still tasted terrific. As for my husband, it was his first time seeing and eating these meatballs covered with “sticky” rice and for my surprised he enjoyed it. It is a very simple recipe, you just need a little planning as the glutinous rice needs to the soaked overnight for easy cooking.

So gather the ingredients below and give these little pearls or whatever name you like a try.

Ingredients:

  • ½ cup glutinous rice
  • 1 lb lean ground pork
  • 4 dried shiitake mushrooms, soaked and finely chopped
  • 1 ½ tablespoons ginger,  finely grated
  • 3 stalks green onion, finely chopped
  • 2 tablespoons cooking wine
  • 2 tablespoons soy sauce
  • 2 teaspoons sesame oil
  • 1 tablespoon vegetable oil
  • 1 egg
  • Salt and pepper to taste
  • Green peas, soybean and/or carrot in cubes for decoration

Method:

The day before, rinse the sticky rice until the water runs mostly clear and soak overnight at room temperature.

On the day, drain well all the water from the glutinous rice by using a strainer and transfer on a deep dish or plate.

Mix the ground pork with all the other ingredients together except the glutinous rice, carrot and pea. Mix well, until all the meat and the other ingredients are binding together.

Make small balls with the meat mixture. I personally put a glove on my left hand and pick a small amount of the meat mixture, gently make a fist and scoop the balls of meat forming in between my thumb and pointer finger using a wet spoon so the meatballs will not stick to it.

Gently drop the meatball on the plate with the glutinous rice and roll the balls until all of it is coated with the glutinous rice. Repeat the process with the remaining meat mixture.

Decorate each meatball with carrot or pea.

Steam the meatballs on high heat for approximately 15 to 20 minutes until the meatballs and the glutinous rice are completely cooked. The glutinous rice will be somewhat translucent.

Serve hot with soy sauce, chili sauce or both.

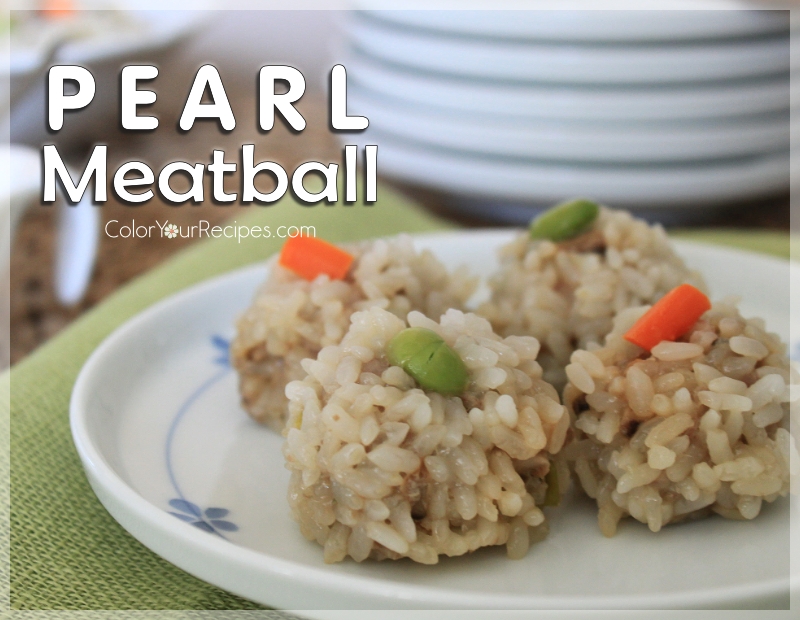
Did you know that glutinous rice is gluten free? Yes, the name is very deceiving…it is called glutinous due to its stickiness and glue-like after cooking. Glutinous rice is also called sticky rice and sweet rice. Glutinous rice is also ground to make flour and used in many Asian desserts, also know as mocha flour.

Thank you for visiting Color Your Recipes…have a colorful week!


Cooking with Ariosto Seasonings

Ariosto seasoning are very versatile, it can be used in kind of dish.  Either you are cooking fish, chicken, meat or even vegetable a bit of the seasoning and you have a tasty dish. Here I am sharing a few recipes using Ariosto seasoning.

Have you ever heard of Ariosto seasoning? Well, I did not until I was contacted by the company to give a try…talking about this, I would like to state that once I accepted the invitation, these seasonings were sent to me.  I did not receive any compensation for this post and all the content and opinion in this post are solely mine.

Now that I made my statement…back to the post…I was very excited to try these seasoning and yes, I did use the one for meat and chicken and the fish one.  I first tried by simply gently sprinkling on the steak, chicken or fish…it was pretty tasty, but one need to make sure to not add to much as the salt content is high. I have tried the meat/chicken and the fish seasoning…both were very tasty and easy.  Before adding the seasoning I drizzled the meat, chicken or fish with olive oil and then sprinkle the seasoning. Simple as that!

After sampling Ariosto seasoning in the most straightforward way I decided to be a bit more daring…so I am sharing with you two different recipes using the seasoning for chicken and meat. Actually one, as for the meat sauce for pasta, I just added the Ariosto seasoning to the ground meat…the sauce turned out delicious as my husband praised me for the flavor.

Basic Brine for Juicy and Tender Chicken Breast

Many times when grilling chicken, especially chicken breast I find that the chicken breast turns out way too dry for my taste, therefore by simply placing the chicken breast in a brine, it will greatly increase the moist and tenderness of the chicken.

Ingredients:

  • 2 large skinless and boneless chicken breasts
  • 1 tablespoons of cooking wine or vodka
  • Ariosto seasoning,  per Carni Arrosto e ai Ferri
  • 1 ½  to 2 cups of cold water
  • 1 tablespoon olive oil

Method:

In a medium bowl add the water, cooking wine (or vodka) and the seasoning to taste.  Make sure that is a bit saltier than you want your chicken to taste.

Gently place the chicken breast into the bowl with the brining. Cover and refrigerate for approximately 5 hours.  I find that you need at least 1 hour to have a moist and tender chicken breast.

When ready to grill the chicken breast, drain the brine and gently pat dry the meat with paper towel.  Drizzle the olive oil on the chicken breast, making sure that they are coated with the oil.

Grill the chicken breast according to your like.

Below I am sharing some pictures for meat sauce using Ariosto seasoning…

Either you are cooking chicken or meat…try adding Ariosto seasoning…it sure will be very flavorful!

After seeing this post I hope you get to try this seasoning…

Thank you for stopping at Color Your Recipes…have a colorful day!


Cinnamon Rolls in Cups

These cinnamon rolls come in cups…it is easy and less messy to serve. I used the water-roux method for the dough, therefore the bun is very soft and together with the crunchiness of the walnut, the sweetness of raisins…all this together blended with a layer of cinnamon…is absolutely delicious. Not to mention when these buns are in the oven, the whole house just smell SO good.
These buns can be stores in the freezer. To serve, warm them in the microwave.

Ingredients:

Water roux or Tangzhong
75 ml of water
15 g of bread flour

Dough
2 cups bread flour
¾ teaspoon salt
1½ tablespoon sugar
2 tablespoon butter
1½ teaspoon dry yeast
1 large egg and complete to 100 ml with heavy cream

1 tablespoon cinnamon
1 ½ tablespoon sugar
1/3 cup raisins
1/3 cup chopped walnut

Method:

Water roux
Mix flour and water in a small saucepan. Cook over low to medium heat, stirring constantly until it reaches 65ºC/149ºF. The mix will turn to a paste and you can see the bottom of the pan. Remove from heat, cover with a saran wrap film over the paste and leave until lukewarm.

Dough
Add the water roux and all the dough ingredients to the mixer, knead for approximately 15 minutes, the dough reaches a thin membrane. The dough will be slightly sticky. Let is rise for approximately 2 to 3 hours in a cover container or until it double its initial volume.

Assembly
Punch down, knead the dough and roll into a rectangular shape of approximately 13 x 9 inches. Spread the cinnamon, the sugar, walnut and raisins. Roll it and cut into 12 pieces. Place them in a standard size cupcake pan. Cover the buns with saran wrap film and let rise until double in size.
Bake in preheated 350°F oven for about 12 to 15 minutes, or until golden brown.
Serve warm.

Hope you enjoy this recipe and have a wonderful week!

Thank you for stopping by Simple Recipes!


Corn Soup with Chicken

This corn soup is very satisfying in spite of being low in fat. It is great as a meal by itself.

Ingredients:

3 ears of corn on the cob cooked in water
1 can of chicken broth
2 eggs slight beaten
1 cup of leftover chicken
1 tablespoon corn starch dissolved in 3 tablespoon of water
1 tablespoon sesame oil
¼ cup fresh green onion finely chopped

Method:

Cut the corn from the cobs and place the corn in the blender with water just enough to cover the corn and blend (chop mode).

I like to have the corn in pieces where I still can bite them. If you like them in less solid form, just chop for a longer time.

Pour the corn, chicken broth and an extra measurement of water in a pan under a high heat. Once the soup starts to boil, add the chicken. Again bring to boil and gently add the corn starch dissolved in water, stir constantly. Once the soup start to bubble, add the slightly beaten egg and finish by adding sesame oil and green onion.

Serve hot.

Did you know that corn contain high levels of antioxidants? Antioxidants are known to decrease the incidence of cancer and heart disease.
Interestingly when you cook corn you lose vitamin C but you gain ferulic acid which is an antioxidant.

Thank you for stopping by Simple Recipes and have a great week!