1

Singapore Style Stir-fried Thin Rice Noodle

These thin rice noodles are delicious, slightly chewy, springy, and loaded with flavor. Super versatile as you can add whatever you want.

– Why Taiwanese thin rice noodles?

Because they are super well known and they are thinner than the ones made in other countries.

– How the rice noodle is different from the regular wheat noodles?

Rice noodle if cooked correctly are slightly chewy, springy and take in all the flavors added to it. Together with all the ingredients it sure makes a great and easy meal.

– Why Singapore style?

It is Singapore style just because curry powder was added to it but you can omit and add all kind of flavors such as soy sauce, oyster sauce, chicken broth and so on. The noodle will absorb the flavor.

– Are you ready to try on these noodles?

Ingredients:

  • Taiwanese thin rice noodles (Made in Taiwan)
  • ½ lb. pork or chicken
  • 4 Chinese sausage
  • 1 medium size red onion, thinly sliced
  • 3 stalks of green onions
  • ½ cabbage, shredded (can substitute for any other vegetable)
  • 3 carrots, shredded
  • 1-2 tablespoons of curry powder
  • 2 eggs, lightly whipped
  • 1 teaspoon vegetable oil
  • 1 teaspoon sesame oil
  • Salt and pepper to taste
  • Fresh cilantro

Method:

Follow the instruction on the package of the rice noodle.

Slice the pork or chicken and marinade with soy sauce, oil, pepper, and corn starch. Set aside.

Drain the rice noodles and prepare a wok for cooking.

Fry the eggs and once cooled cut into strips, set aside.

Stir-fry the pork or chicken and set aside.

Stir- fry sausage, and then add red onion, green onion. Set aside.

Stir-fry the vegetables until slightly soften.

Add the rice noodle (well drained) and all the remaining ingredients that was set aside.

Mix gently, add salt, pepper, and curry to your taste

Serve with fresh cilantro.

– If you enjoy this recipe, you might want to check on these…

Thank you for visiting Color Your Recipes…have a colorful week!


Asian Style Cheeseburger

Looking for easy and fast meal ready to go at any time? These soft buns filled with gooey cheese and ground beef are “a must”.

– How these burgers taste?

Well, the gooey cheese mixed with the flavorful ground beef in between super soft and cottony dough is just heaven…and no mess at all!

– Why are these Asian cheeseburgers so good?

They make an easy meal if you have them in the refrigerator or freezer…just warm them up and serve with a side of salad.

– Can you make these cheeseburgers ahead?

Absolutely, they can stand the freezer very well. The buns can be warmed in the oven or microwave, whichever way you like.

– Ready to look at the recipe?

Ingredient:

Bread dough from the recipe HERE.

Ground beef filling

  • ½ tablespoon olive oil
  • 1 lb. ground beef, 85%
  • ½ large onion finely chopped
  • 4-5 garlic cloves, finely minced
  • ½ teaspoon dry oregano
  • ¼ teaspoon ground all-spice
  • Salt and pepper to taste
  • 100 g mozzarella cheese, cut into small cubes or grated
  • Egg wash
  • Sesame seeds
  • 180 g cheddar cheese, cut into small cubes or grated

Method:

Bread dough

When ready to use, split the dough into16 small balls of approximately 72 g each.

Let it rest on the counter covered for 10 minutes.

Ground beef filling

In a frying pan or wok sauté the onion with garlic until golden and aromatic.  Add the ground beef and stir fry until the meat is cooked, by stirring. While stirring add all the spices.

Let it cool and add the cheese, mix until uniform. Set aside for assembly of the buns.

Assembly

Flat the dough and open into a disk using a rolling pin.

Add into the middle of the disk approximately 45 g of the ground beef and cheese mix.

Seal the bun with the ground beef mix in the middle and shape into a ball.

Repeat the procedure with all the remaining dough.

In the meantime, turn the oven to 350oF.

Cover the buns and let it proof until its size double.

When ready to bake brush the egg wash on top of the buns and sprinkle with sesame seed.

Bake in a preheated oven of 350oF for 15-17 minutes.

Remove from the oven and let it cool slightly before serving.

– Looking for more bread recipes? Check these out…

Thank you for visiting Color Your Recipes…have a colorful week!


Savory and Chewy Green Onion and Cheese Pancake

What is better than the combination of green onion and cheese…all together in a crispy and chewy pancake?

In this recipe I used home grown green onion, as my backyard rewards me with gigantic green onions year long, not to mention that green onions are good for your health.

– Is this a pancake?

Okay this is not your traditional pancake, the ones that you mainly eat in breakfast, light and fluffy. On the contrary, these pancakes are crispy, chewy and savory.

– Why should you try this savory pancake?

Because it is so delicious, the combination of green onion (scallion) and cheese is just so yummy, not to mention the crispy layer on the outside and the chewy and flaky layer on the inside.

– Where this recipe come from?

Well, in Asia, green onion or scallion pancake is very popular, it is served in restaurants, street vendors, you name it…but the addition of cheese is something that you will not find it there.

– Cheese in Chinese green onion pancake?

Why not? Adding cheese was just “natural” as we see so many recipes here in US which combine green onion and cheese…so this is how the “Green Onion and Cheese Pancake” was born. This is an example of East meet West…

– Did I tempt you to try this recipe? You will not regret…

Ingredients:

  • 400 g bread flour
  • 3 g salt
  • 120 g hot water
  • 135 g water
  • 3-4 green onion finely chopped
  • Cheddar cheese, shredded to taste
  • Olive oil

Method:

In a bowl place the flour and salt. Mix well and add the hot water on the flour. Mix carefully with a spoon or fork to not burn yourself.

Add the room temperature water to the flour mix and knead until a ball forms. If the dough is too sticky add a bit more of flour.

Cover and let the dough rest for 20 to 30 minutes.

Split the dough into 6 small pieces and roll into balls (approximately 70 g each).

Oil the small dough and rest for 10 minutes.

Flat the balls into round or rectangular disks using a rolling pin and brush oil on it. Spread some chopped onion and cheddar cheese on it.

Roll it like a Swiss roll and pinch to seal, then roll it again like a spiral with pinched side in the inside of the roll. Tuck the loose end under the rolled bun.

Using a rolling ping roll the spiral bun into a flat disk of about 18 to 20 cm (7-8 inch) in diameter.

Repeat the procedure for all the remaining dough.

Heat a frying pan or cast iron over medium to high heat and add the pancake, no need to add oil as the pancake will not stick to the pan.

Cook for one minute and flip the pancake and cook for another minute approximately.

Flip the pancake until both sides and slightly brown and crispy.

Remove from the pan and place on a plate.

I usually cut into 4 or 6 pieces and serve warm/hot.

– If you enjoy this recipe, you might want to check on these…

Green onion and scallion are the same thing? Green onion are allium (garlic in latin) and they have been used as a medicine to combat bacteria, viruses and fungi. Moreover, they are loaded of antioxidants that can defend your body against cell damage caused by free radicals.

Thank you for visiting Color Your Recipes…have a colorful week!


Passion Fruit Curd Cream Cheese Braided Bread

This is an awesome combination of tangy passion fruit curd and creamy sweet cream cheese filling inside a soft and cottony braided bread.

This bread is absolutely delicious, each soft and pillowy bite is loaded with the tangy passion fruit curd with a sweet creamy cream cheese….perfect in the morning with a cup of coffee or accompanied with a cup of tea in the afternoon.

– Why is this braided bread so unique?

The combination of passion fruit curd and cream cheese is so unique and exotic.

– How long this bread will stay fresh and soft?

This bread, because was baked using Tanzhong method will stay fresh for many days. And if you have any leftover, store in the refrigerator in an air-tight container and warm it up when serving.

– Is it hard to make this braided bread?

It is very easy, this is one of the things that looks more complicated that, so do not get intimidated by the braiding.

– Are you ready to try this recipe?

Ingredients:

Tangzhong or water roux

  • 50 g bread flour
  • 250 ml water

Bread dough

  • 550 g bread flour
  • 80 g sugar
  • 7 g salt
  • 7 g yeast
  • 30 g non-fat dry milk
  • 2 eggs (minus 1 ½ tablespoon), approximately 100 g
  • 20 ml water
  • 2 teaspoons vanilla extract
  • 70 g butter

Cream Cheese Filling

  • 4 oz cream cheese (light or regular), room temperature
  • 2 tablespoons plain yogurt
  • 2-3 tablespoons sugar
  • 2 teaspoons lemon juice
  • ½ teaspoon vanilla extract
  • 2 tablespoons all-purpose flour
  • Passion Fruit Curd, homemade or store bought

Method:

Tangzhong or water roux

Whisk together the water and the flour until the mixture is well blended and free of lumps.

Stir the mixture while it cooks over the medium heat to reach 65C/150F. It takes about 2-3 minutes.

Continue whisking until the mixture starts to thicken. The mixture of flour will have “lines”.

Remove from the heat.

Transfer to a bowl, cover with a plastic film to avoid “skin” from forming.

Ready to add to the bread dough once is cool.

Water roux or Tangzhong can bend kept in the fridge for up to 48 hours.

Bread dough

In the mixer, add all the water roux, and all the other ingredients under bread, except for the butter.

Turn the machine and stir for 2 to 3 minutes, until a uniform very wet and sticky dough.

Increase the speed to “2” and let it mix for 15 minutes. The dough should be very sticky. Do not add extra flour as the dough will be less sticky as gluten forms.

Add the butter and mix for 15 to 20 minutes more. Take a small portion of the dough (like a golf ball) and stretch gently until a very thin and transparent membrane (windowpane).

If the dough tears, mix for another 2-3 minutes until you achieve the windowpane test. This test demonstrates that the gluten is very well developed, and it will create a very light crumb. The dough should be very elastic.

Remove the dough from the mixer and place in a bowl by covering with a plastic film.

Let dough proof until the dough tripled to its original size.

In the meantime, make the cream cheese filling

Cream Cheese filling

In a small bowl place, the cream cheese and sugar, whisk until soft and creamy.

Add the lemon juice, vanilla extract and continue whisk until well incorporated into the cream cheese.

Add the shifted all-purpose flour into the cream cheese mix and mix well.  Set aside until ready to use.

Assembly

Gently deflate the dough on a floured counter and roll it out to about 10″ x 15″ rectangle.

Using metal ruler, lightly press two lines down the dough lengthwise, dividing it into approximately three equal columns.

Cut diagonally strips one inch apart down the length of the outer parts of your dough. Make sure both sides have the same number of approximately 1-inch strips.

Spread the cream cheese filling int center of the rectangle, leave approximately 1 ½ inch of the top and bottom without filling. Spread the passion fruit curd over the cream cheese filling.

Fold top flap down and bottom flap up over the filling. Lift the top dough strip and bring it diagonally across the filling. Repeat alternating right and left side until the bottom of the dough.

Carefully transfer the braided bread on to a baking sheet lined with parchment paper.

Cover the braided bread and let if rise at room temperature for approximately 45-60 minutes, or until the dough double from its original size.

When ready to bake, pre-heat the oven to 375oC. Use the separated egg from the dough and brush the top of the braided bread.

Bake for 25 to 30 minutes, or until the loaf is golden brown.

Remove from the oven and let it cool on a wire rack.

Serve warm or at room temperature.

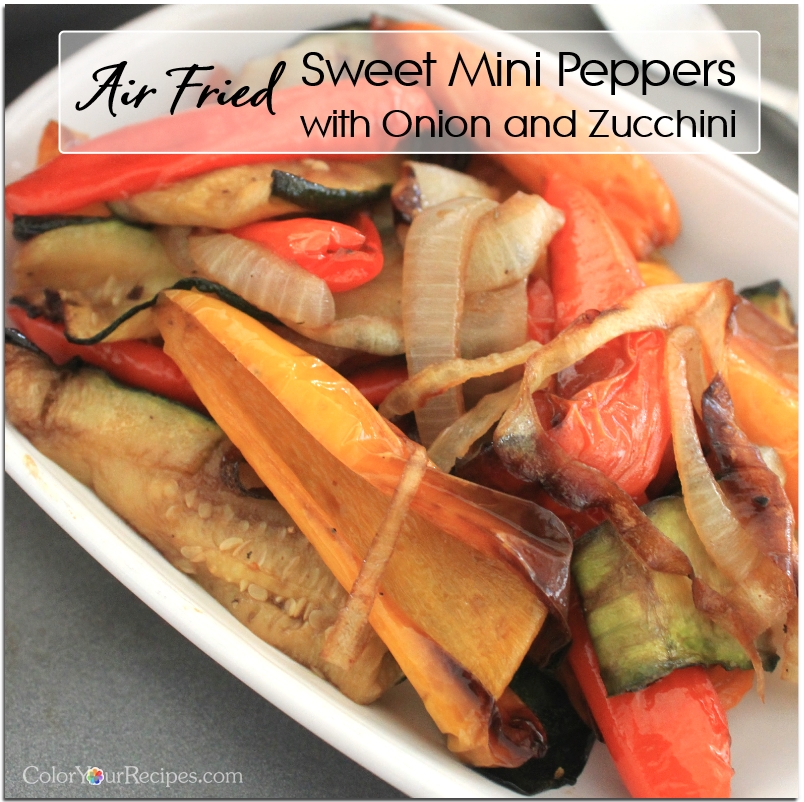
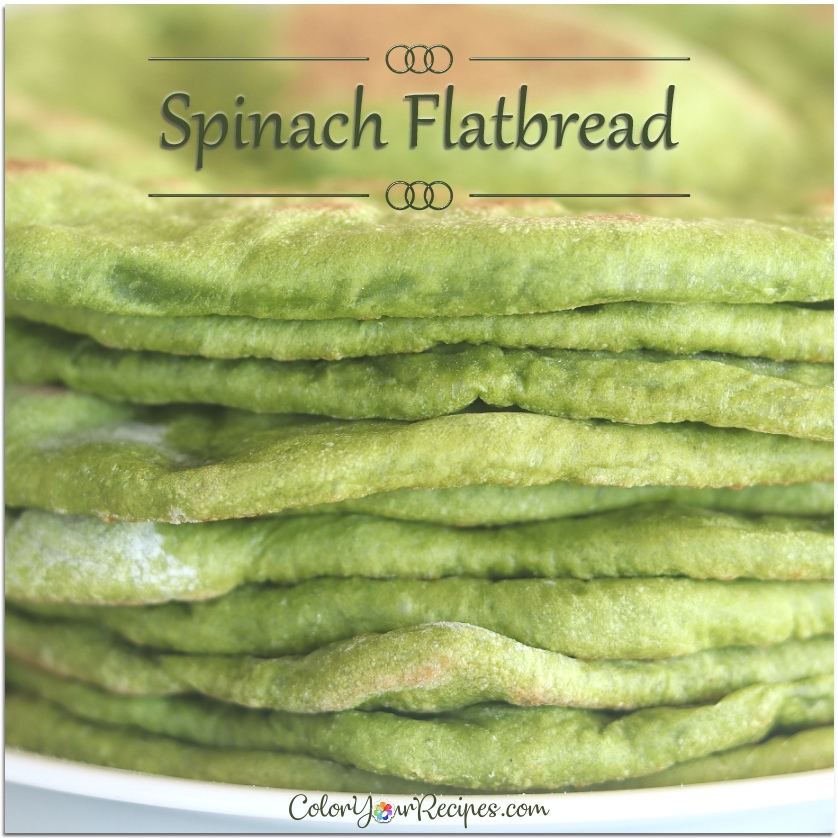
– If you enjoy this bread recipe, you might want to check on these…

Thank you for visiting Color Your Recipes…have a colorful week!


Miso Beef Stew

Beef stew with miso paste? Yes, it is super tasty with lots of umami flavor. Great over rice, pasta or bread.

This miso beef stew is super hearty and comforting…and so, so easy to make. It is loaded with flavorful pieces of meat, potatoes, kind mushrooms, carrots and celery.

– Why use Instant Pot?

Instant Pot cooks under pressure, therefore in less than one hour the meat is tender and packed with flavor, cutting the time of cooking.

– Do I need miso paste?

Definitely, miso paste gives this beef stew the well-known umami flavor…

– Can I cook this beef stew in advance?

Yes, you can cook up to 3 days in advance. Refrigerate once it is at room temperature and when it is time to serve heat it up on the stove. Alternatively, you can freeze if you want to store for longer time.

– Are you ready to try this umami beef stew?

Ingredients:

  • 1 ½  lbs beef for stew in cubes, approximately 1½ in
  • 1 medium yellow onion, cut into 1-inch chunks
  • 3-4 cloves garlic, finely chopped
  • ½ lb carrots, peeled and cut into 1 in chunks
  • 1 lb nibble potatoes (or any kind of potatoes, cut into 1 in
  • 1 lb mini king oyster mushrooms or combination of any kind of mushrooms
  • 4-5 celery stalks, cut into 1 in length
  • 1 tablespoon butter
  • 1 tablespoon olive oil
  • 2 tablespoons ketchup
  • 3 tablespoons red miso
  • 1 tablespoon sake
  • 1 tablespoon mirin
  • 1 cup beef broth
  • Salt and pepper to taste
  • Fresh green onion for garnish

Method:

Season beef chunks with salt and pepper, to taste and set aside while preparing all the other ingredients.

Turn the Instant Pot to sauté, once the pot is hot and the meat. Cook for a few minutes until sides of the meat are browned.

Remove the meat from the pot.

Add the butter on the pot and sauté the onion and garlic. Place the meat back and add ketchup, red miso, sake, mirin and beef broth.

Stir, and seal the Instant Pot, and set to high pressure for 8 minutes. Let the pressure release naturally.

Add all the vegetables and mushroom and cook under high pressure for another 2 minutes. Again, let the pressure release naturally.

Add more salt or pepper if necessary.

Garnish with finely chopped green onion, serve hot over rice or pasta.

– Want more beef recipes? Check these out…

Did you know that miso is a form of fermented soybeans? Therefore, miso provides good bacteria to your gut. Consumption of miso has been linked to better digestion and stronger immune system. One must careful since miso is very high in sodium.

Thank you for visiting Color Your Recipes…have a colorful week!


Passion Fruit Curd Layer Cake

This cake is layered with homemade passion fruit curd, super light, fluffy with a creamy rich and fragrant curd…perfect for any occasion.

I already make 3 batches of passion fruit curd…and twice this layered cake. The cake just disappears…it is true I share with friends and family, but I can guarantee that the cake will not stay long in the refrigerator.

– What is a better way to serve the fragrant passion fruit curd?

In between layers of light and fluffy vanilla chiffon cake

– Why is this cake so delicious?

Imagine a bite of super light cake loaded with fragrant, tangy and slightly sweet passion fruit curd…do I need to say more? If you believe in magic…this cake is magical…

– Did I convince you to try this cake?

Ingredients:

  • 5 jumbo/large eggs separated
  • 65 g vegetable oil
  • 65 g milk
  • 110 g cake flour, shifted
  • 1 pinch salt
  • 1 ½ teaspoons vanilla extract
  • 85 g sugar
  • 10 g vinegar
  • Homemade Passion Fruit Curd (recipe HERE)

Method:

Preheat oven at 275oF.  Line a 14 x 9 inch (36 cm x 23 cm) jelly pan with parchment paper.

In a small bowl, mix cake flour with salt, and set aside.

In a medium bowl, stir together egg yolks, milk, oil and vanilla extract.  Add the sifted mix of cake flour and salt to the egg yolk mixture. Mix well until smooth and all the flour is well incorporated, resembling a pancake mix batter.

In a large bowl of a hand-held mixer or stand mixer whisk the egg white with the vinegar until large bubbles form. Add the sugar slowly into thirds. Whisk until medium/firm peaks form. Do not over beat, the meringue should be shiny and form soft but firm peaks.

Add about ⅓ of the meringue to the egg yolk mixture and mix gently until all the egg white is incorporated to the batter.

Pour the egg yolk mix to the remaining meringue and fold gently until all the egg white is combined to the batter.

Pour the batter into the prepared baking sheet and spread evenly. Gently tap the pan against the counter to remove excess of air bubbles. Lower the temperature to 275oC and bake for approximately 20 minutes or until a toothpick inserted in the middle of the cake comes out clean.

Remove cake from the oven and transfer it with its parchment paper onto a wire rack and let it cool.

Flip the cake to another piece of parchment paper of silicone mat.

Peel the parchment paper from the cake and cut into 3 equal sections.

Roll the cake gently, then unroll it spread a layer of lemon curd and roll it back. Wrap tightly with a plastic wrap. Repeat the same procedure with the other half piece of cake.

Place the cake roll in the refrigerator for a couple of hours before serving.

– If you like this Swiss cake roll, you might want to look at these dessert recipes…

Thank you for visiting Color Your Recipes…have a colorful week!


Apple Cinnamon Buns

These are delicious, soft and cottony buns filled with pieces of sweet apples and a hint of cinnamon. Great as breakfast or afternoon snack.

Now that Autumn is here, there are all kind of apples in the market. Why not use the seasonal fruits to fill the buns?

This is an Asian version of apple cinnamon buns…I used the tangzhong method for the dough, therefore the dough is super light and fluffy and the buns stay fresh and soft for many days.

More details about tangzhong can be found HERE.

– Why are these rolls so delicious?

The combination of the soft and cottony dough with small pieces of apples are just so delicious…every bite comes with apple…giving a feeling of warmth…Autumn is here.

– Can I substitute apples for any other fruit?

Pears will work well for these buns.

– Are you ready to give these buns a try?

Ingredients:

Tangzhong or water roux

  • 50 g bread flour
  • 250 ml water

Bread dough

  • 550 g bread flour
  • 90 g sugar
  • 7 g salt
  • 7 g yeast
  • 75 g non-fat dry milk
  • 2 eggs (minus 1 ½ tablespoon), approximately 100 g
  • 55 ml water
  • 2 teaspoons vanilla extract
  • 100 g butter

Apple Filling

  • 400 g apple peeled and cut into small pieces
  • 65 g sugar
  • 2 teaspoons fresh lemon juice
  • 1 tablespoon water
  • 1 tablespoon ground cinnamon

Method:

Tangzhong or water roux

Whisk together the water and the flour until the mixture is well blended and free of lumps.

Stir the mixture while it cooks over the medium heat to reach 65C/150F. It takes about 2-3 minutes.

Continue whisking until the mixture starts to thicken. The mixture of flour will have “lines”.

Remove from the heat.

Transfer to a bowl, cover with a plastic film to avoid “skin” from forming.

Ready to add to the bread dough once is cool.

Water roux or Tangzhong can bend kept in the fridge for up to 48 hours.

Bread dough

In the mixer, add all the water roux, and all the other ingredients under bread, except for the butter.

Turn the machine and stir for 2 to 3 minutes, until a uniform very wet and sticky dough.

Increase the speed to “2” and let it mix for 15 minutes. The dough should be very sticky. Do not add extra flour as the dough will be less sticky as gluten forms.

Add the butter and mix for 15 to 20 minutes more. Take a small portion of the dough (like a golf ball) and stretch gently until a very thin and transparent membrane (windowpane).

If the dough tears, mix for another 2-3 minutes until you achieve the windowpane test. This test demonstrates that the gluten is very well developed, and it will create a very light crumb. The dough should be very elastic.

Remove the dough from the mixer and place in a bowl by covering with a plastic film.

Let dough proof until the dough tripled to its original size.

In the meantime, make the apple filling.

Apple Filling

In a medium pot, place all the ingredients listed under apple filling.  Cook under high heat for approximately 10 minutes, until the apples are slightly soft.

Remove from the heat and let it cool. Set Aside until ready to assemble the rolls.

Assembly

Knock back the dough and divide into 2 balls. Roll one dough into a rectangle of approximately 45 x 35cm (approximately 18 x 14in). Smear a thin layer of butter or its substitute on the rectangle dough.

Evenly sprinkle ½ of the apple filling, roll it like a Swiss roll from the long edge, and roll it into a tight log. Turn the seam to the bottom. Make a small mark on the log in the middle and then into 4 and again and again until you have the log divided into 16.

Gently cut on the mark without smashing the rolls.  Place the rolls in a square or round pan, I used the 2 small round pan and one ring pan.

Cover and let it rise, approximately double of its original size. Brush with egg wash and bake in a preheated oven at 350oF for 25 to 30 minutes. Remove and let it cool.

– If you like this recipe and looking for more Asian baked good, please check these out…

Thank you for visiting Color Your Recipes…have a colorful week!


Sauté Sweet Potato Leaves

This is a very simple yet healthy dish using sweet potato leaves…you only need olive oil, garlic, salt and pepper…super delicious!

I have been super busy lately…we had a new addition to our family…a furry puppy! His name is Mochie and he came to us when he was about 8 weeks…we had him for almost 7 weeks and has been a lot of joy for both of us. It is true that having a young puppy is a lot of work, especially for the first two weeks…now Mochie is potty trained and has been sleeping throughout the night.

Mochie is a Morkie, Maltese mom and Yorkie dad…he was only 1lb and 13 oz whe he came to us, now he is a bit over 3 lbs. He loves to play in the backyard and he nibbles on the sweet potato leaves…besides all the stuff he finds on his way.

Now…back to the sweet potato leaves…

– Can you eat sweet potato leaves?

Definitely, they are 100% edible, much like spinach…it can be cooked by sautéing, stir-fried, added to soup or salad. Moreover, sweet potato leaves can be used as a spinach substitute.

– Where can I find sweet potato leaves?

Well, I grow them in the backyard…and they are super easy to maintain…a small area with good soil and lots of water.  The leaves grow almost vine like plants…

Other option is to get them in Asian grocery store or farmer’s market…I actually started growing sweet potato leaves after I bought one bunch from the farmer’s market and made cutting with the main stems…once the roots start to grow in water I transplanted into the soil, and now I have endless sweet potato leaves.

– How do sweet potato leaves taste?

The leaves taste like spinach, maybe a bit chewier and they do not leave the weird “spinach teeth” film from the high content the oxalic acid found in spinach.

The simplest way is to sauté them with garlic and olive oil just until they’re wilted…no secret at all…

– Are you ready to give these green leaves a try?

Ingredients:

  • 1 bunch sweet potato leaves
  • 3-4 garlic cloves, finely chopped
  • 1 to 1½ tablespoons olive oil
  • Salt and pepper to taste
  • Fish sauce (optional)

Method:

Pinch the stem attached to the leaves from the main steam.

Wash and rinse many times, making sure to remove all the unwanted particles and drain the excess of water.

In a wok, heat the olive oil over medium heat, add the garlic and stir until slightly golden and aromatic.

Add the sweet potato leaves and turn the heat to high.

Stir fry, add salt and pepper to taste and fish sauce if using. If using fish sauce add less salt. Stir constantly until all the leaves are wilted.

Serve hot.

– Looking for more easy vegetable dishes…check these out…

Did you know that sweet potato leaves are very nutritious and rich in antioxidants? When compared to leafy greens sweet potato leaves contain more dietary fiber. Moreover, they are rich in Vitamin C, A, thiamin, niacin and folic acid.

Thank you for visiting Color Your Recipes…have a colorful week!


Garden Tomato Salad with Shiso

This salad is loaded with freshly harvested tomatoes from our garden and spiked with shiso, super fragrant with citrus notes.

This summer my vegetable/fruit garden grew very well, since we had to stay home, I spent a lot of time in the backyard, watering, trimming and “talking” to the plants.

I have never had tomato bushes reaching the roof, herbs grew so large that resemble little trees, and fruit trees/vines were exceptionally fruitful…

Somehow when you make food with your harvest, they taste special. Today, I am sharing a very simple and yet refreshing salad using tomatoes and shiso leaves from my garden. Shiso leaves pair very well in salad especially when citrus flavors are added…in this recipe I used ponzu which is a citrus seasoned light soy sauce.

– Have you ever heard of shiso?

Shiso is very popular in Japanese cuisine paired with uni (sea urchin), sashimi, sushi, in salad or as a wrap. Moreover, shiso can be used in stew as well.

– How does shiso leave taste?

I found that shiso is like cilantro for many people, either you love it or you hate it…shiso has a pretty strong flavor, it is minty with hints of cinnamon, citrus, basil, cilantro and other flavors…very hard to describe. Once you had it you will never forget its flavors and fragrant.

– Is it hard to grow shiso herb?

Not at all, they are pretty much self-seed, and come back every year. The plant like sun, at least half of the day and does not require any special treatment. You can grow from cutting too, by placing in water until the roots come out and plant in well-drained soil after.

– Are there more varieties of shiso?

Yes, green and red, both are very similar in flavor, although the red ones seems to have a stronger flavor as compared to the green ones.

– Are you ready to try this recipe?

Ingredients:

  • Tomatoes
  • Cucumber
  • Avocado
  • Shiso leaves
  • Ponzu sauce
  • Fresh squeezed lemon juice
  • Salt and pepper to taste
  • Olive oil

Method:

Slice tomatoes and cucumber, about ½ inch and place in a bowl.  Add the cubed avocado and mix gently.

Wash the shiso leaves, dry and cut into small strips (julienned), and set aside.

In the bowl drizzle ponzu sauce, lemon juice, olive oil, salt and pepper to taste.

Toss in the salad mix the julienned shiso leaves.

Serve cold.

– If you are looking so simple and refreshing recipes for the summer, you might want to check on these…

Did you know that shiso leave has anti-inflammatory properties? Moreover, shiso contain antioxidant and anti-allergy properties as well. Shiso leaves are rich in calcium, iron and vitamin A.

Thank you for visiting Color Your Recipes…have a colorful week!