1

Sourdough Green Onion and Cheese Bread

The combination of green onion and cheese in this sourdough bread is just divine..great just as it is or drizzle with some olive oil for extra flavor.

– Why green onion and cheese?

Don’t you think that there is something about the combination of green onion and cheese? Somehow the blend of flavors and colors are always so welcomed.

– Why using sourdough starter?

It seems that baking bread with sourdough starter is healthier than using the conventional bread yeast due to the bread’s prebiotic content, therefore easier to digest.

– What is sourdough starter?

Sourdough starter is a culture of wild yeast found in flour. Like any fermented food, sourdough bread is fermented using lactobacillus. The combination of wild yeast (found in flour) and lactic-acid bacteria is what makes the dough rise.

– Is sourdough bread easier to digest?

Scientists believe that the prebiotic content in sourdough bread may improve gut health and ease digestion. Moreover, gluten levels are lower in sourdough bread as compared to traditional yeasted bread.

– Are you ready to try baking sourdough bread?

This particular recipe uses 80% hydration…meaning that I used 80 g of water for every 100 g of flour.

– Should we look at the recipe?

Ingredients:

  • 200 g mature sourdough starter (100% hydration)
  • 400 g bread flour
  • 300 g water
  • 10 g salt
  • 200-250 g cheese (mozzarella and cheddar)
  • Green onion to taste, chopped

How to:

In a medium bowl whisk the bread flour and water until all the water is totally incorporated into the flour. Cover and let it rest for about 1 hour, this is called autolyze.

Add the sourdough starter to the dough and mix until the starter is completely mixed to the dough. Use the stretch and fold method around the bowl, approximately 50 times, at this point gluten will start to form.

Cover the dough and let it rest for 30 to 45 minutes.

Add the salt and mix again using the stretch and fold method until all the salt is totally incorporated into the dough. Cover the dough and let it rest for 30 to 45 minutes.

Stretch and fold the dough a few times until the dough detach from the bowl easily. Cove the bowl and let the dough rest 30 to 45 minutes.

Spray the counter with a little water and place the dough on it.  Laminate the dough, spread the chopped green onion and the cheese and fold into thirds, twice. Place the dough into a rectangular or square container and cover.

Rest for 30 to 45 minutes. Coil and fold the dough to the center. Place it back to the container and cover.

Rest for 45 minutes and repeat the coil and fold the dough to the center.

Rest for 45 minutes. Place the dough over the moist counter and coil and fold dough twice.

Rest for 45 minutes.  Sprinkle flour on the counter and on the top of the dough. Flip the bowl on the counter and let the dough fall on the flour surface.

Split the dough into two equal portions.

Pre-shape the dough by stretching and folding to the center of the dough.

Flour well the banneton and place the dough seam up.

Place the dough in the refrigerator overnight, uncovered.

Next morning, pre-heat oven to 475oF with a tray of water.

In the meantime, boil more water.

Flip the dough from the banneton to a floury surface. Using a soft brush, gently brush off excess of flour. Make the cut on the dough and spray with water. Place the dough into the hot oven.  Carefully add the boiling water to the tray. Close the oven door.

Spray more water on the dough every 3 minutes, 3 times. After 15 minutes of baking, remove the water tray and the parchment paper underneath the bread. Lower the temperature to 375oF, bake for another 20 minutes.

Remove the bread from the oven and let it cool on a wire rack. Make sure the bread is completely cool before slicing.

– If you enjoy this sourdough bread recipe, you might want to look at these…

Thank you for visiting Color Your Recipes…have a colorful week!


Sourdough Beetroot Swirl Sandwich Bread

All your family will love this soft and cottony sandwich bread with pretty beetroot swirls in it.

– Why you need to try this sandwich bread?

Because it is fun, and you will get lots of “wow” with the red swirls in between the slices.

– Is it hard to bake this bread?

Not at all, it is fun to roll and shape the dough, as every slice will have a unique pattern.

– Why beetroot?

Because it adds color and it is packed with good nutrients such as potassium, nitrates, antioxidants, and the list go on.

– Are you ready to add some beetroot powder in the bread recipe?

Ingredients:

  • 150 g sourdough starter
  • 530 g bread flour
  • 60 g sugar
  • 3 g yeast
  • 8 g salt
  • 30 g dry milk powder
  • 50 g butter, unsalted
  • 250 g water
  • 15 g beetroot powder plus

Method:

Put all the ingredients in the mixer, except beetroot powder and butter. Mix until all the ingredients are together, it will be slightly sticky.

Increase the speed to number 2 and continue to mix for 5 minutes.

Add the butter and continue the mixing until the dough is smooth and comes out of the mixing bowl, this will take approximately 15 minutes. You will notice that the dough will no longer be sticky, and it will reach the windowpane stage.

Take approximately ⅓ of the dough and add beetroot powder, knead until the dough is smooth and all the powder is incorporated into the dough. You might want to add a little bit of water.

Place dough into separate bowls. Cover and let it proof until the size triple from the original size.

Now it is time to shape the dough…

Knock back both dough and split each portion into eight balls, and let it rest for 5 minutes on the counter.

Flatten the white balls using a roller pin into an elongated disk and place the flatten red dough onto ½ portion of the white disk. Fold the white dough onto the red one. Using a rolling pin flat the dough into a rectangle shape. Fold it into thirds and roll it like a Swiss roll.

Repeat the process with the remaining 7 white and red dough balls. Place 4 Swiss rolls into each Pullman pan and let it rise until triple of its original size, like almost 85-90% of the pan.

Cover the pan and bake in a preheated oven of 350oF for approximately 25 minutes.

Remove from the oven and flip the bread into a wire rack to cool. Slice according to your like.

Store the bread in an airtight container.

– Looking for more interesting bread recipes? Please look at these…

Thank you for visiting Color Your Recipes…have a colorful week!


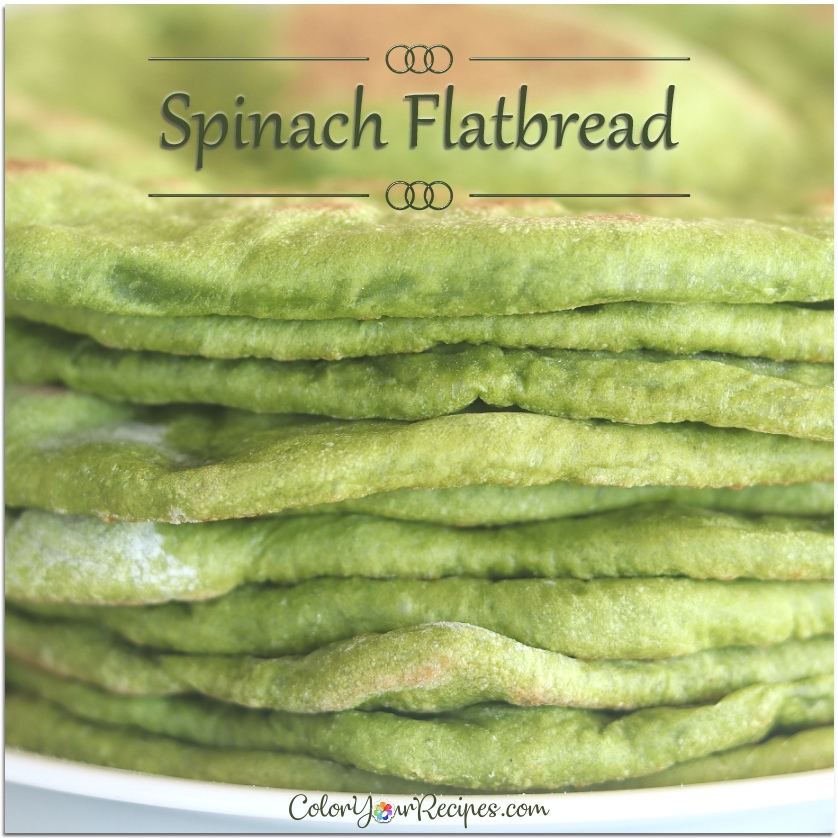
Spinach Flatbread

These spinach flatbreads are super easy to make…they are soft pillowy and loaded with the goodness of spinach.

– How easy are to make these flatbreads?

Super easy, just mix, knead a little, let it rise, divide into small balls, flat the balls, and cook on the skillet. No secret at all.

– Why these spinach flatbreads are so good?

The texture of these flatbreads is super soft, pillowy, and so aromatic with all the spinach puree in it.

– How do you serve these flatbreads?

You can use them like sliced bread, tortilla, pizza crust…use your imagination. They are very versatile!

– Are you ready to try this recipe?

Ingredients:

  • 200 g spinach leaves
  • 150 g water
  • 500 g AP flour
  • 10 g yeast
  • 10 g sugar
  • 15 g olive oil

Method:

In a blender place the spinach leaves and water, blend until all the leaves are puréed.

Mix all the dry ingredients in a medium bowl

Add oil and spinach puree, mix until a ball forms.

Cover the dough and rest until the dough double/triple its initial size.

Divide the dough into ten little balls.

Roll out each dough into a thin disk using a rolling pin.

Cook in a preheated skillet, medium-hot, for approximately 1 minute each side.

Keep the flatbreads warm by wrapping them in a kitchen towel until you are ready to serve.

Store the leftover in an air-tight container in the refrigerator.

Warm them up by wrapping up the flatbread with moist paper towel and reheating in the microwave.

– If you enjoy this simple recipe of spinach flatbread you might want to check on these…

Thank you for visiting Color Your Recipes…have a colorful week!


Asian Style Cheeseburger

Looking for easy and fast meal ready to go at any time? These soft buns filled with gooey cheese and ground beef are “a must”.

– How these burgers taste?

Well, the gooey cheese mixed with the flavorful ground beef in between super soft and cottony dough is just heaven…and no mess at all!

– Why are these Asian cheeseburgers so good?

They make an easy meal if you have them in the refrigerator or freezer…just warm them up and serve with a side of salad.

– Can you make these cheeseburgers ahead?

Absolutely, they can stand the freezer very well. The buns can be warmed in the oven or microwave, whichever way you like.

– Ready to look at the recipe?

Ingredient:

Bread dough from the recipe HERE.

Ground beef filling

  • ½ tablespoon olive oil
  • 1 lb. ground beef, 85%
  • ½ large onion finely chopped
  • 4-5 garlic cloves, finely minced
  • ½ teaspoon dry oregano
  • ¼ teaspoon ground all-spice
  • Salt and pepper to taste
  • 100 g mozzarella cheese, cut into small cubes or grated
  • Egg wash
  • Sesame seeds
  • 180 g cheddar cheese, cut into small cubes or grated

Method:

Bread dough

When ready to use, split the dough into16 small balls of approximately 72 g each.

Let it rest on the counter covered for 10 minutes.

Ground beef filling

In a frying pan or wok sauté the onion with garlic until golden and aromatic.  Add the ground beef and stir fry until the meat is cooked, by stirring. While stirring add all the spices.

Let it cool and add the cheese, mix until uniform. Set aside for assembly of the buns.

Assembly

Flat the dough and open into a disk using a rolling pin.

Add into the middle of the disk approximately 45 g of the ground beef and cheese mix.

Seal the bun with the ground beef mix in the middle and shape into a ball.

Repeat the procedure with all the remaining dough.

In the meantime, turn the oven to 350oF.

Cover the buns and let it proof until its size double.

When ready to bake brush the egg wash on top of the buns and sprinkle with sesame seed.

Bake in a preheated oven of 350oF for 15-17 minutes.

Remove from the oven and let it cool slightly before serving.

– Looking for more bread recipes? Check these out…

Thank you for visiting Color Your Recipes…have a colorful week!


Walnut and Cranberry Sourdough Bread

The combination of the nutty walnut and tart/sweet cranberry in this sourdough bread is just amazing…delicious plain or smeared with butter.

– Why sourdough bread?

Sourdough bread completely count on wild yeast found in air and lactobacillus to leaven the dough, very different from the bread leavened by commercial packaged yeast.

– Is sourdough bread healthier than the regular bread?

Apparently, bread using sourdough starter can be somehow considered as prebiotic, therefore it might help your intestine flora with good bacteria. Because the digestion of the starches starts to breakdown during the fermentation making sourdough bread easier to digest.

– How can I control the sourness of the sourdough bread?

To make it easier to understand…the longer the dough ferments the sour the bread will turn out, with this in mind let’s consider two scenarios.

  1. X amount of dough in a bowl + Y amount of sourdough starter
  2. X amount of dough in a bowl + 2Y amount of sourdough starter

Dough (B) has twice amount of sourdough starter as compared to dough (A).

When both doughs are placed to proof, the dough (B) will leaven faster than dough (A) right? It will take much longer to dough (A) to reach the same level of leavened as dough (B) because started with less raising agent (sourdough starter), so dough (A) will taste sourer than dough (B).

The take home message…the less sourdough starter used the sourer the bread will turn.

Now that I really confused you…

– Should we go to the recipe now?

Ingredients:

  • 65 g mature sourdough starter (1:1:1)
  • 255 g water
  • 275 g bread flour
  • 50 g whole wheat flour
  • 6 g salt
  • 12 g olive oil
  • 60 g toasted walnut (small pieces)
  • 60 g dry cranberries

Method:

Start by mixing both flours, water, and oil together in a medium bowl. Make sure that all the flour is incorporated into the water. Cover and let flour mix rest for 1 hour (hydrolysis).

Add the sourdough starter to the dough and mix until the starter is completely mixed to the dough. Use the stretch and fold method around the bowl, approximately 50 times. There will be gluten forming.

Cover the dough and let it rest for 30 minutes.

Add the salt and mix again using the stretch and fold method until all the salt is totally incorporated into the dough.

Rest the dough for 45 minutes and perform stretch and fold method on the dough. You will notice gluten forming as the dough will stretch farther.

Rest the dough for 45 minutes and perform lamination.

Spray the counter with a little water and place the dough on it.  Stretch the dough a much as you can, forming a rectangular shape.

Spread the walnut and cranberry on ⅔ of the sheet and fold into thirds, and again into thirds. Place the dough into a container and cover. Rest the dough for 45 minutes.

Perform sets of coil and fold and rest 45 minutes in between until the dough is somehow set, all the sides of the dough can pretty much hold itself.

When ready to pre-shape, sprinkle flour on the counter and on the top of the dough. Flip the bowl on the counter and let the dough fall on the flour surface.

Stretch the dough gently to form a rectangle, fold both side to the center and roll the dough. Seam the end of the dough.

Flour well the banneton and place the dough seam up.

Place the dough in the refrigerator overnight, uncovered.

Next morning, pre-heat oven to 475oF with an empty tray.

In the meantime, boil water.

Flip the dough from the banneton to a floury surface. Using a soft brush, gently brush off excess of flour. Make the cut on the dough and spray with water.

Place the dough into the hot oven.  Carefully add the boiling water to the empty tray to create steam. Close the oven door.

Spray more water on the dough every 3 minutes, 3 times. After 15 minutes of baking, remove the water tray and the parchment paper underneath the bread. Lower the temperature to 375oF, bake for another 20 minutes.

Remove the bread from the oven and let it cool on a wire rack. Make sure the bread is completely cool before slicing.

– Did you enjoy this recipe, you might to look at these other bread recipes…

Thank you for visiting Color Your Recipes…have a colorful week!


Passion Fruit Curd Cream Cheese Braided Bread

This is an awesome combination of tangy passion fruit curd and creamy sweet cream cheese filling inside a soft and cottony braided bread.

This bread is absolutely delicious, each soft and pillowy bite is loaded with the tangy passion fruit curd with a sweet creamy cream cheese….perfect in the morning with a cup of coffee or accompanied with a cup of tea in the afternoon.

– Why is this braided bread so unique?

The combination of passion fruit curd and cream cheese is so unique and exotic.

– How long this bread will stay fresh and soft?

This bread, because was baked using Tanzhong method will stay fresh for many days. And if you have any leftover, store in the refrigerator in an air-tight container and warm it up when serving.

– Is it hard to make this braided bread?

It is very easy, this is one of the things that looks more complicated that, so do not get intimidated by the braiding.

– Are you ready to try this recipe?

Ingredients:

Tangzhong or water roux

  • 50 g bread flour
  • 250 ml water

Bread dough

  • 550 g bread flour
  • 80 g sugar
  • 7 g salt
  • 7 g yeast
  • 30 g non-fat dry milk
  • 2 eggs (minus 1 ½ tablespoon), approximately 100 g
  • 20 ml water
  • 2 teaspoons vanilla extract
  • 70 g butter

Cream Cheese Filling

  • 4 oz cream cheese (light or regular), room temperature
  • 2 tablespoons plain yogurt
  • 2-3 tablespoons sugar
  • 2 teaspoons lemon juice
  • ½ teaspoon vanilla extract
  • 2 tablespoons all-purpose flour
  • Passion Fruit Curd, homemade or store bought

Method:

Tangzhong or water roux

Whisk together the water and the flour until the mixture is well blended and free of lumps.

Stir the mixture while it cooks over the medium heat to reach 65C/150F. It takes about 2-3 minutes.

Continue whisking until the mixture starts to thicken. The mixture of flour will have “lines”.

Remove from the heat.

Transfer to a bowl, cover with a plastic film to avoid “skin” from forming.

Ready to add to the bread dough once is cool.

Water roux or Tangzhong can bend kept in the fridge for up to 48 hours.

Bread dough

In the mixer, add all the water roux, and all the other ingredients under bread, except for the butter.

Turn the machine and stir for 2 to 3 minutes, until a uniform very wet and sticky dough.

Increase the speed to “2” and let it mix for 15 minutes. The dough should be very sticky. Do not add extra flour as the dough will be less sticky as gluten forms.

Add the butter and mix for 15 to 20 minutes more. Take a small portion of the dough (like a golf ball) and stretch gently until a very thin and transparent membrane (windowpane).

If the dough tears, mix for another 2-3 minutes until you achieve the windowpane test. This test demonstrates that the gluten is very well developed, and it will create a very light crumb. The dough should be very elastic.

Remove the dough from the mixer and place in a bowl by covering with a plastic film.

Let dough proof until the dough tripled to its original size.

In the meantime, make the cream cheese filling

Cream Cheese filling

In a small bowl place, the cream cheese and sugar, whisk until soft and creamy.

Add the lemon juice, vanilla extract and continue whisk until well incorporated into the cream cheese.

Add the shifted all-purpose flour into the cream cheese mix and mix well.  Set aside until ready to use.

Assembly

Gently deflate the dough on a floured counter and roll it out to about 10″ x 15″ rectangle.

Using metal ruler, lightly press two lines down the dough lengthwise, dividing it into approximately three equal columns.

Cut diagonally strips one inch apart down the length of the outer parts of your dough. Make sure both sides have the same number of approximately 1-inch strips.

Spread the cream cheese filling int center of the rectangle, leave approximately 1 ½ inch of the top and bottom without filling. Spread the passion fruit curd over the cream cheese filling.

Fold top flap down and bottom flap up over the filling. Lift the top dough strip and bring it diagonally across the filling. Repeat alternating right and left side until the bottom of the dough.

Carefully transfer the braided bread on to a baking sheet lined with parchment paper.

Cover the braided bread and let if rise at room temperature for approximately 45-60 minutes, or until the dough double from its original size.

When ready to bake, pre-heat the oven to 375oC. Use the separated egg from the dough and brush the top of the braided bread.

Bake for 25 to 30 minutes, or until the loaf is golden brown.

Remove from the oven and let it cool on a wire rack.

Serve warm or at room temperature.

– If you enjoy this bread recipe, you might want to check on these…

Thank you for visiting Color Your Recipes…have a colorful week!


Apple Cinnamon Buns

These are delicious, soft and cottony buns filled with pieces of sweet apples and a hint of cinnamon. Great as breakfast or afternoon snack.

Now that Autumn is here, there are all kind of apples in the market. Why not use the seasonal fruits to fill the buns?

This is an Asian version of apple cinnamon buns…I used the tangzhong method for the dough, therefore the dough is super light and fluffy and the buns stay fresh and soft for many days.

More details about tangzhong can be found HERE.

– Why are these rolls so delicious?

The combination of the soft and cottony dough with small pieces of apples are just so delicious…every bite comes with apple…giving a feeling of warmth…Autumn is here.

– Can I substitute apples for any other fruit?

Pears will work well for these buns.

– Are you ready to give these buns a try?

Ingredients:

Tangzhong or water roux

  • 50 g bread flour
  • 250 ml water

Bread dough

  • 550 g bread flour
  • 90 g sugar
  • 7 g salt
  • 7 g yeast
  • 75 g non-fat dry milk
  • 2 eggs (minus 1 ½ tablespoon), approximately 100 g
  • 55 ml water
  • 2 teaspoons vanilla extract
  • 100 g butter

Apple Filling

  • 400 g apple peeled and cut into small pieces
  • 65 g sugar
  • 2 teaspoons fresh lemon juice
  • 1 tablespoon water
  • 1 tablespoon ground cinnamon

Method:

Tangzhong or water roux

Whisk together the water and the flour until the mixture is well blended and free of lumps.

Stir the mixture while it cooks over the medium heat to reach 65C/150F. It takes about 2-3 minutes.

Continue whisking until the mixture starts to thicken. The mixture of flour will have “lines”.

Remove from the heat.

Transfer to a bowl, cover with a plastic film to avoid “skin” from forming.

Ready to add to the bread dough once is cool.

Water roux or Tangzhong can bend kept in the fridge for up to 48 hours.

Bread dough

In the mixer, add all the water roux, and all the other ingredients under bread, except for the butter.

Turn the machine and stir for 2 to 3 minutes, until a uniform very wet and sticky dough.

Increase the speed to “2” and let it mix for 15 minutes. The dough should be very sticky. Do not add extra flour as the dough will be less sticky as gluten forms.

Add the butter and mix for 15 to 20 minutes more. Take a small portion of the dough (like a golf ball) and stretch gently until a very thin and transparent membrane (windowpane).

If the dough tears, mix for another 2-3 minutes until you achieve the windowpane test. This test demonstrates that the gluten is very well developed, and it will create a very light crumb. The dough should be very elastic.

Remove the dough from the mixer and place in a bowl by covering with a plastic film.

Let dough proof until the dough tripled to its original size.

In the meantime, make the apple filling.

Apple Filling

In a medium pot, place all the ingredients listed under apple filling.  Cook under high heat for approximately 10 minutes, until the apples are slightly soft.

Remove from the heat and let it cool. Set Aside until ready to assemble the rolls.

Assembly

Knock back the dough and divide into 2 balls. Roll one dough into a rectangle of approximately 45 x 35cm (approximately 18 x 14in). Smear a thin layer of butter or its substitute on the rectangle dough.

Evenly sprinkle ½ of the apple filling, roll it like a Swiss roll from the long edge, and roll it into a tight log. Turn the seam to the bottom. Make a small mark on the log in the middle and then into 4 and again and again until you have the log divided into 16.

Gently cut on the mark without smashing the rolls.  Place the rolls in a square or round pan, I used the 2 small round pan and one ring pan.

Cover and let it rise, approximately double of its original size. Brush with egg wash and bake in a preheated oven at 350oF for 25 to 30 minutes. Remove and let it cool.

– If you like this recipe and looking for more Asian baked good, please check these out…

Thank you for visiting Color Your Recipes…have a colorful week!


Classic French Toast

This is a recipe that is super easy and fast…delicious French toast that makes every morning special.

Who does not like waking up in the morning with the smell of French toast?

The sweet, buttery, cinnamon eggy smell…so enticing…

I must confess that I do not make French toast as much as I should considering that I bake so much bread. Most of the time the bread is gone…

I purposely cut 4 thick slices of my egg sandwich bread and separated for this recipe.

Back in Brazil, we call it “rabanada” and usually serve by sprinkling with cinnamon and sugar, so the concept of maple syrup was totally new to me.

– Why French toast is so versatile?

You can use all kind of bread and all kind of egg mixture.

– How long should I dip the bread into the egg mixture?

I personally like mine French toast kind of crispy on the outside and almost creamy inside…almost like a bread pudding. Can you picture it?

– Ready to try this super easy and delicious recipe?

Ingredients:

  • 2 large eggs
  • ½ cup milk (or any dairy free milk of your preference)
  • 1 tablespoon sugar
  • ¼ teaspoon salt
  • 1 teaspoon vanilla extract
  • 1 ½ teaspoons ground cinnamon
  • 4 thick slices egg sandwich bread or challah
  • Butter

Method:

In a flat bottom plate whisk together egg, milk, sugar, salt, vanilla, and cinnamon

Place bread slice, one at a time into the egg mixture and flip to the other side, making sure both sides of bread are well-coated with the egg mixture. Set aside.

Repeat with all the remaining slices of bread. Make sure the bread absorbs the egg mixture.

Melt butter in a large skillet and place the slices in skillet, cook on medium heat until golden brown and flip to the other side, about 3 minutes.

Serve immediately with maple syrup, whipped cream, fresh fruit or whatever your palate desire.

– Looking for more recipes using bread? Check these out…

Thank you for visiting Color Your Recipes…have a colorful week!


Hybrid Sourdough Ciabatta Bread

This bread is super chewy and has a thin and light crusty crust with holly crumb…delicious as sandwich or just dipped into a nice olive oil…and no-knead!

– Hybrid?

Yes, in this recipe I combined two methods… methods that I used when making sourdough and ciabatta bread…and eliminating many steps.

– How this hybrid bread tastes?

Well, pretty much as the name says…sourdough and ciabatta…the bread is a bit chewer than the ciabatta bread with a hint of the sourness from the sourdough.

– Is this recipe easy to follow?

Absolutely, especially if you have sourdough ready to go…mix all the ingredients and just using stretch & fold and stretch & coil method…no-kneading at all. Just be very patient and let time work on the dough and strengthen the dough by development of gluten.

– How do I store the bread?

I usually leave one loaf in the refrigerator wrapped in plastic bag when consumed in a few days. Toast the slices or reheat the whole loaf at 350oF for 20-30 minutes.

– Can I freeze the bread?

Yes, as soon as the bread cools down, place in a freezer bag, remove as much air as you can and store in the freezer until ready to enjoy. You can thaw the bread by placing the bread overnight in the refrigerator and reheat at 350oF for 30 minutes or so by spraying the crust with water before placing it in the oven.

– Are you ready to try this easy and yet delicious bread?

Ingredients:

  • 180 g sourdough starter (100% hydration)
  • 915 g bread flour
  • 695 g water
  • 2 g yeast
  • 15 g salt
  • 30 g olive oil

Method:

The tutorial for the 78% hydration ciabatta can be found HERE.

In a rectangle container with lid, mix the water with yeast.  Stir gently until all the yeast is totally dissolved.

Add in the sourdough starter and mix. Next add olive oil, flour and salt.  Mix using a Danish dough whisk or spatula as the dough will be very wet.

Mix until the dough comes together.

Cover the dough and let it rest for 1 hour in a warm environment.

Using a stretch and fold method, wet your hands and gently pull the dough from one side of the container and fold into the middle of the dough. Do the same on the other three sides of the container, folding always into the middle of the dough.

Once all the sides had been stretched and fold over, flip the dough so the fold in on the bottom of the dough.

Cover and again let it rest in a warm place for 45 minutes to 1 hour.

Once the time is up, perform the same stretch and fold (all for sides of the container and tuck the fold on the bottom again). Cover and let it rest in a warm place for another 45 minutes to 1 hour.

Next we will be using the coil and fold method. Wet your hands and reach under the dough which is spread on the container and lift slowly, the front of the dough will detach and go under forming a coil, repeat on the opposite side. Then use the same method on the other side.

Let it rest for 45 minutes and repeat the method of fold/coil. Cover and let it rest in a warm place for 45 minutes to 1 hr. The dough will be very giggling…if you feel that the dough does not have enough elasticity, go another round of fold/coil.

Sprinkle flour on the counter and on top of the dough. Turn the container with the dough on the counter and let the dough fall into the flour surface.

Sprinkle more flour on the top of dough and loose the bottom with the help of dough scraper.

Cut into 4 pieces, and gently place them on a parchment paper lined cookie sheet.  Sprinkle more flour on the top to avoid sticking. Cover and let it rest for approximately 1 to 1 ½ hour.

In the meantime, preheat the oven to 450oF with an empty pan on the bottom of the oven and boil approximately 1 to ½ cup of water.

Spray the dough with a little water, then place the dough into the oven and carefully add the boiling water on the empty pan to create steam. Close the oven door and bake for 15 minutes at 450oF.

For the first 15 minutes, spray a little water in the oven every 3-4 minutes. After the 15 minutes, remove the water in the oven and lower the temperature to 425oF and bake for another 15 minutes.

Turn the oven off and leave the oven door ajar for 10 minutes.

Remove the sourdough ciabatta from the oven and let it cool completely on a wire rack.

– Looking for different bread recipes? Check these out…

Thank you for visiting Color Your Recipes…have a colorful week!