1

Air Fried Bean Curd Sheet with Vegetables

This is a very simple and yet fulfilling Asian inspired dish using air fried bean curd sheet, a great alternative for substituting meat.

– Where can you find bean curd sheet?

Since we moved, every time I go visit my mom I have to stop by an Asian grocery store and stock up with lots of fresh vegetables, refrigerated and frozen food. It is true that we have Asian market in the area, but I always feel that it is not as abundant and fresh as in the areas where are more populated by Asians, supply and demand…

One of my favorite item is the fresh bean curd sheet, which is found in the refrigerator section…I discovered that it can perish fast and a great way to preserve is by using the air fryer. Once the bean curd sheets are “baked” in the air fryer and the moist removed it can be stored in the refrigerator or freezer for much longer time.

The bean curd sheet is so Asian, what I mean without any discrimination is that you need to acquire the taste for it…and I was so surprised that my husband really enjoys it…the texture is very different from the regular tofu, and I am not talking about soft, regular or firm…the bean curd sheet is somehow stretchy, slightly chewy and can absorb a lot of flavor.

I hope you get a chance to try it…you will find it very different and interesting.

– Let’s start cooking…

Ingredients:

1 package fresh bean curd sheet

1 inch fresh ginger cut into thin strips

2 cups water

¼ cup soy sauce

1 tablespoon sugar

1 tablespoon sesame oil

Red pepper flakes to taste

Salt and pepper to taste

Method:

Pat dry the bean curd sheet and cut into 1 inch wide. Randomly separate the layers and place in the 325-350F preheated air fryer for about 15 to 20 minutes, until the bean curd sheets are golden brown and crispy. Shake the basket every so often to prevent the sheets from sticking together.

Once the bean curd sheets are ready, remove from the air fryer and set aside. Place all the other ingredients in a medium pot. Bring to boil then add the air fried bean curd sheet. Bring to boil and turn the heat to simmer.

As the air fried bean curd sheets absorb the sauce it will shrink. Simmer for about 15 minutes, if needed add more water, salt and pepper.

Remove from the heat.

At this point, it can be served as it is or added to any stir-fry vegetable.

– More recipes with soybean curd?

Yes, if you enjoy this simple and easy vegetarian item, you might want to take a look at Tofu Fa recipe which is a dessert made with soft bean curd.

Did you know that bean curd sheet is a film form from boiling soy milk? The film is similar to the film formed when boiling milk. The soy milk film is then accumulated and dried acquiring a yellowish color, unlike the soy milk. Bean curd sheet is also called bean curd skin or tofu skin.

Thanks for visiting Color Your Recipes, have a colorful week!


Air Fried Sweet Mini Peppers with Onion and Zucchini

This is one of my favorite method to “roast” sweet mini peppers. It is super easy and fast…it’s lightly caramelized and perfect on bread, crackers or salad.

I love the colors of the sweet pepper, so summery and refreshing.  Many times we just eat them raw…crunchy and sweet, but sometimes I like to enhance the sweetness of the peppers by roasting…

I used to roast mini peppers in the oven…but since I got the air-fryer, this is my preferred way to “roast” almost anything…I love how even and caramelized the sweet peppers turned out in the air-fryer.  All the excess liquid, either from the washing or the pepper itself just drains out of the basket.

This recipe is very versatile, you can air-fry only the mini peppers or mix and match it with all kind of vegetables, I decided to go with zucchini and onion as I had them handy, but feel free to use whatever vegetable you have available such as carrots, eggplant, yellow squash…

Once the vegetables are air fried and seasoned you can keep them in the refrigerator for a few days and serve cold, which I love during warm weather.

Ingredients:

1 lb sweet pepper

1-2 zucchinis

1 medium size onion

Olive Oil

Balsamic Vinegar to taste

Freshly ground salt and pepper to taste

Method:

Preheat air fryer to 400F.

Wash and slice in half the sweet peppers and remove the seed. Slice the zucchini and the onion.

In a large bowl place the sweet mini peppers and drizzle with olive oil.

Carefully place the sweet peppers in the air fryer basket and let is cook for approximately 15 minutes. Make sure to shake the basket in between. Remove from the basket and place in a large bowl.

Do the same with the onion and zucchini. Once the onion and zucchini are done place them together with the sweet peppers.

Add salt and pepper and drizzle balsamic vinegar to taste.  Toss gently.

Serve warm or cold.

I hope you enjoy this simple method of roasting mini sweet peppers…for more air-fryer recipes, please check HERE.

Did you know that peppers contain large amount of antioxidants such as lycopene, beta carotene, lutein and zeaxanthin? These carotenoids are important, especially for the eyes.

Thank you for visiting Color Your Recipes…have a colorful week!


Persian Eggplant Dip

This is a very healthy and tasty dip made with roasted eggplants.  The recipe is simple and the trick to its delightful taste is the caramelized onion and golden garlic together with a hint mint…all together in a smoky, creamy and silky eggplant.

Since I had the eggplant dip (Kashke Badmjan) at a local Persian restaurant I wanted so bad to make it at home…when I noticed these huge, really huge eggplants at Trader Joe’s I saw the opportunity to try and I end up bringing home two of this gigantic eggplants.

Eggplants are healthy in spite of a large amount of water. Eggplants contain dietary fiber, vitamins and minerals.

After searching the internet for inspiration, I end up adapting today’s recipe from Minimalist Baker and Food 52.

This eggplant dip is delicious served with fresh pita bread or pita chips. Traditionally it is served with pita bread, but I love the combination of light and crispy pita chips with the creaminess of the eggplant…so it is up to you…

Ingredients:

  • 2 large eggplants (cut into 1/4 inch rounds // skin on)
  • 1 large onion, thinly sliced in half moon
  • 4 cloves garlic, finely minced
  • 1 tablespoon fresh mint, finely chopped
  • 1 tablespoon olive oil
  • Salt and pepper to taste
  • ½ teaspoon turmeric
  • Sea salt + ground pepper
  • Plain yogurt, Greek or regular

Method:

Wash and poke the eggplants with a fork, place them on a foil-lined pan. Roast in a preheated oven of 375 to 400F for about 45 min to 1 hour until the eggplants are soft.

While the eggplants are in the oven, caramelize the onion, preferably in a cast iron pan over medium heat to high heat. Add the onions.  Cook for a few minute until they start to soften, stirring so the heat distribute evenly.

Reduce the heat to medium low and continue stir once in a while so the onions brown equally. The onions will reduce and become more and more golden. Remove the onions from the pan once the onion developed a deep and caramelized flavor. Set aside.

In the same pan, add the minced garlic with the mint and let it turn golden under medium heat, stir constantly, so the garlic will not burn. Remove from the heat and add to the caramelized onion.

Once the eggplants are soft and somewhat the skin burnt Remove from the oven, let it cool and then remove the inside of the eggplant with a spoon. Mash the eggplant with a fork.

In the same cast iron skillet place the mashed eggplant, salt, pepper, turmeric and cook for a few minutes stirring constantly. Once the mixture is even, add the mixture of caramelized onion and garlic.

Cook for another 3 to 4 minutes, adjust more seasoning if necessary stirring frequently.

Before serving add plain yogurt. Serve warm or at room temperature.

I hope you enjoy this simple and easy recipe for an eggplant dip…you might want to take a look of Homemade Hummus or Jalapeno Artichoke Crab Dip recipes.

Did you know that eggplant is a fruit and classified as a berry? Moreover, the seeds of eggplants contain nicotinoid, which are substance related to the ones found in tobacco, both are species of nightshade plants.

Thank you for visiting Color Your Recipes….have a colorful week!


Apple Mint Salad

This is a very simple, refreshing salad made mainly with apple, fresh squeezed orange juice and fresh mint. This salad is a great side dish for any occasion, especially with grilled meat or poultry…the refreshing and crisp apples with a hint of mint is very invigorating with fatty meal, giving the meal a nice balance.

I learned this recipe with my little sister when she brought a large bowl of this apple salad and we all loved it…I could not believe that such a simple recipe with only a few ingredients could be so good. The combination of the crispy apples with orange and a hint of mint is so pleasant for the palate. I meant to share this recipe a while ago but somehow never got to it…and now with July 4th approaching it is a perfect occasion to do so.

Mint…I love growing all kind of herbs, as a matter of fact I have a bunch of different herbs, more than I can ever use…it is so nice to be able to just pick what I need and use…anyway, let’s move to the recipe, which is not much of a recipe…just adjust to your taste…

Ingredients:

  • Apple as many as you need, preferably Fuji, Honeycrisp, Jazz or any crispy type.
  • Freshly squeezed orange to coat the apple
  • Fresh mint, to your taste
  • Salt, just a pinch
  • Olive oil, drizzled

Method:

Peel and core the apples, slice then thinly and cut into matchstick. Use a vegetable slicer or mandolin. Place them into a bowl.

Squeeze the orange juice over the apples and toss gently until the apples are coated with the juice.

Add a bit of salt and olive oil.

Toss in the thinly cut mint, mix gently. Serve cold.

I hope you enjoy this simple and healthy recipe using apple, you might want to take a look at Zucchini Ribbons Salad recipe.

Did you know that apples are high in fiber and loaded with antioxidants. Therefore apples may help your heart health and reduce risk of developing cancer.

Thank you for visiting Color Your Recipes…have a colorful week!


Simple Air-Fried Curry Cauliflower

This simple and tasty cauliflower can be made by simply combining a bit of curry and after a few minutes in the air-fryer you will have a super healthy side dish.

Here I am again with another recipe using the air-fryer…I must confess that this is one of the most used gadget in my kitchen and I regret not getting it earlier…I have been experimenting with all kind of food, and so far I am pretty content with the results, especially that so little oil is needed if any in order to accomplish flavorful dishes.  Moreover, it is so easy to clean…which is a very important element when it comes to everyday cooking…with no more words, I will go ahead with this week recipe.

Ingredients:

  • 1 head of cauliflower cut into small florets, about ¾ in.
  • 1 ½ tablespoon olive oil
  • 1 to 2 teaspoons curry powder
  • Salt and pepper to taste

Method:

Preheat the air fryer to 350°F

In a bowl, toss together the cauliflower, olive oil, curry powder, salt and pepper.

Place the cauliflower in the fry basket and insert into the air fryer. Cook until the cauliflower is lightly browned, about 6 to 7 minutes, gently shake the basket halfway through roasting.
Transfer the cauliflower to a bowl and serve hot/warm.

I hope you enjoy this simple, healthy and easy recipe for cauliflower using air-fryer.

Did you know that cauliflower is from the Brassicaceae family? The same family from broccoli, cabbage, brussels sprouts, kale and collard green.

Thank you for stopping by Color Your Recipes…have a colorful day!


Air-Fried Brussels Sprouts

If you do not care for Brussels sprout, this recipe will change your mind…by simply placing the sprouts in the air fryer and you will totally change your mind about not liking Brussels sprouts.

Lately I try to add Brussels sprouts on our table, and I have tried so many recipes, from stir-fry to roasting, and I have to admit that I am very impressed when I air fried it.  I already air fried Brussels sprouts many times, and now I got it really working well. On my first attempt, I treated the Brussels sprouts as I usually do when roasting in the oven…and realized that the loose leaves would be too well done for our taste (burned) and that we enjoy more the loose leaves as they carry more flavor and its crispy texture. Well, this was an easy solution…just peel off the layers of leaves and separate the leaves from the buds and treat them separately in the air fryer.

It is well worth the “double” stage cooking, as each part of the Brussels sprouts are cooked to precision, to serve just mix them together and you will not be able to stop easting until all the Brussels sprouts are gone, and with not additional dressing or sauce…just as it is!

Oh yes, I wanted to share with you about the knife sharpener, Any Sharp that I received to try…nothing is more annoying than having a dull knife.  I was pretty happy with this knife sharpener, it is small and come in a variety of colors…and yes, it even sharps serrated knife which I used on my bread knife. I like that the fact that it is small (easy to store) and secure to the counter when in use.  For more detail please check AnySharp site….and yes, I did use the sharpener before cutting my Brussels sprouts…

Ingredients:

  • Brussels sprouts
  • Olive oil
  • Salt
  • Pepper, fresh ground

Method:

Wash and dry the Brussels sprouts buds. Cut the tip and peel the leaves as much as you desire and place them in a separate bowl.

Cut the remaining buds in half or quarters according to its size and place is another bowl.

Add olive oil, salt and pepper in both bowls and toss until the leaves and buds are lightly coated.

Preheat the air fryer to 375F.

Air fry the buds for approximately 10 minutes. Shake the basket once in between. Once fried, remove and place them on the serving bowl.

Add the loose leaves to the air fryer basket and cook for about 5 minutes, make sure to check and shake the basket 2 to 3 times in between y as it can burn easily.

Add the air fried Brussels sprouts buds back to the basket, shake to even and air fry to another minute or two.

Serve immediately.

I hope this simple recipe for Brussels sprouts will change your mind and you will incorporate sprouts in your diet.

Did you know that Brussels sprouts are cruciferous vegetables? Some basic research suggest that cruciferous vegetables contain chemicals that might help prevent cancer.

Thank you for stopping by Color Your Recipes…have a colorful day!


Lentil Salad with Roasted Tomatoes

This is a delicious and healthy salad with lentils, cucumber and roasted tomatoes.  It can be served as a side dish or even as a main dish.

This is a simple and tasty lentil salad…it is sure packed with flavors and texture. The flavors are intense…sweet roasted tomatoes to the spicy cumin and the texture are from soft and creamy to crunchy. It can be served as a side dish or as a main meal as I have done many times.

The leftover can be stored in the refrigerator for next day lunch…

Ingredients:

  • 1 ½ cup dry lentils
  • 1 bay leaf (dry)
  • Salt to taste
  • 16oz sugar/grape tomatoes, washed and cut into half
  • 3-4 garlic cloves, finely chopped
  • 1 tablespoon olive oil
  • Fresh thyme to taste, finely chopped
  • Salt and pepper to taste
  • 1 or 2 cucumbers cut into small cubes
  • Fresh cilantro, chopped
  • 1 tablespoon olive oil
  • Apple cider vinegar to taste
  • Cumin to taste
  • Salt and pepper to taste

Method:

Wash the lentil and soak overnight in water, changing a few times

Cook the lentil in water with the bay leaf and a pinch of salt, first at high heat until boiled and then in low heat until the lentil is soft but not mushy.

In the meantime, cut the tomatoes in half and preheat oven to 375F.

In a medium bowl toss together the tomatoes, garlic, thyme, salt, pepper and olive oil. Mix gently until all the tomatoes are cover with oil.

In an oven safe tray, lay the tomatoes in a single layer. Roast for 40 minutes, and then increase the temperature to 425F if you want to caramelize them a bit.

Once the lentil is all cooked, drain well and place in a medium bowl. Let it cool.

Add to the lentil bowl roasted tomatoes, cucumber, cumin, olive oil, apple cider vinegar, cilantro, salt and pepper. Toss gently and serve.

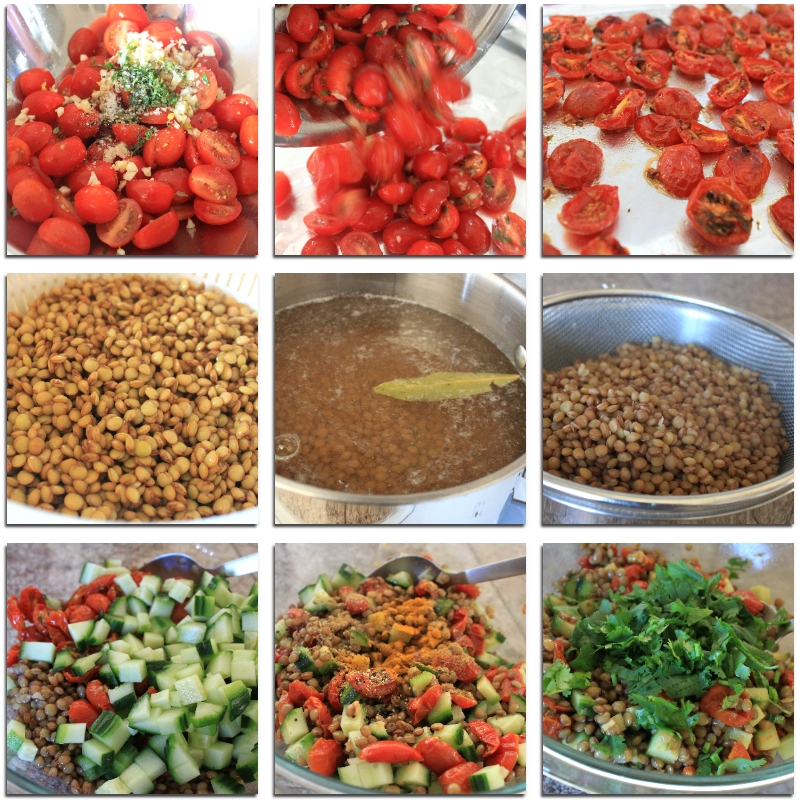
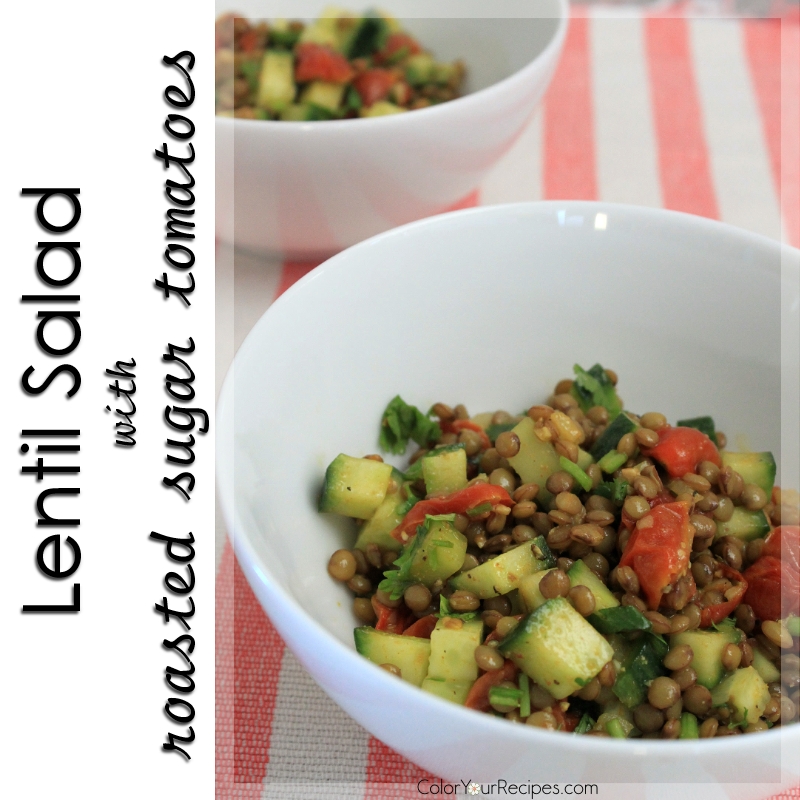
Did you know that lentils are legume? Lentils are high in protein and fiber. Moreover, lentils are a good source of folate and manganese and so easy to prepare.

Thank you for visiting Color Your Recipes…have a colorful week!


Roasted Chickpeas

This simply roasted chickpeas are a great snack, and it come packed with healthy stuff.  They are very versatile and can be spiked with all kind of spices.

I have been wanted to make this roasted chickpeas for ages, but somehow never got the chance to make it until now…and yes, I do regret not have done this earlier. They are very addictive and yes, you can “dress” which ever you like, salty, spicy, tangy, sweet…now that I know how simple and easy these are, I will sure have them all the time.

Chickpeas are also called gabanzo beans, and they are packed with protein and fiber. So why not snack on these healthy little crunchy treats?

Since I want to make sure that all the chickpeas will be totally dry, I roasted them in low heat for a longer time. The end product is so light and crisp, therefore can be eaten warm or totally cold and stored in an airtight container for a while. Great for party and entertainment…

I used the chickpeas that I had cooked from dry ones and frozen, but you can definitely use the ones that come in cans.

Oh! I will be out…we will be visiting Montreal and Quebec…so pardon me if I do not get a chance to “visit” you this week, but will make sure to “see” you when I am back home.

Ingredients:

  • Cooked chickpeas, from scratch or from cans
  • Olive oil
  • Whatever spice you like or even sugar and cinnamon

Method:

Preheat oven to 285F.

Drain and rinse the chickpeas, remove all the water as much as you can.

Place the chickpeas in a bowl, drizzle with olive oil.

Sprinkle the spices of your choices and add salt and pepper according to your like. In this particular batch I sprinkled with cumin, turmeric, chili, freshly ground pepper and a bit of sea salt.

Layer the chickpeas on a silicone mat or parchment paper.

Bake in a preheat oven for approximately 1 ½ to 2 hours until the chickpeas are dry. Make sure to check the ones in the middle of the tray as they take longer to roast as compared to the ones on the side.

Turn off the oven and keep the chickpeas in for about 30 minutes.

Remove from the oven. Serve warm or let them cool completely before storing in an airtight container.

This simply roasted chickpeas are a great snack, and it come packed with healthy stuff.  They are very versatile and can be spiked with all kind of spices ~ Color Your Recipes

Did you know that chickpeas are rich in protein? Moreover, chickpeas contain manganese and folate and are rich in fiber.

Thank you for visiting Color Your Recipes…have a colorful week!


Simple Zucchini Ribbons Salad

This salad made with ribbons of zucchini is so simple and yet so tasty. The zucchini ribbons are layered with Manchego cheese and drizzled with olive oil and apple cider vinegar.

Before I get into this week post, today early morning, I received the news that my friend is now resting…I know that she is in peace and there is no more suffering…no matter how I comfort myself that it is better…still hurts a lot…so I will just keep what I had scheduled to post…

I really want to share this simple recipe that I learned while in North Carolina with my friend before Autumn arrives… This is a super simple salad…contains mainly zucchini and yet so good…very refreshing. Isn’t so interesting that the texture and almost the flavor of any vegetable, fruit, meat, poultry and fish can change according the way that the item has been cut, chopped, sliced, minced, grated…and so on.

I was in love with this salad from the moment I tried it…yes, it sounds like a love story…my friend niece husband is a fabulous cook and on our first dinner, they made lasagna and this zucchini salad, which I adapted slightly…there is no secret…just a few ingredients and voila…you have a beautiful ribbons of zucchini salad. Since I came back I already made this salad many many times…and I am still “in love” with it! Not to mention that this salad is great served with any dish.

Ingredients:

  • 1 medium size organic zucchini, regular or yellow
  • Fresh parsley to taste
  • 1 tablespoon extra virgin olive oil
  • 1 tablespoon apple cider vinegar
  • Fresh grind salt and black pepper
  • Manchego cheese, thinly sliced to taste (or Parmesan)

Method:

Slice the zucchini into thin ribbons and place in a medium bowl.

Add the olive oil, vinegar, salt and pepper. Gently mix until all the zucchini ribbons are coated. Cover and place in the refrigerator for approximately 30 minutes, so the zucchini ribbons are slightly wilted.

In the meantime, chop parsley and slice the cheese.

Add the parsley to the zucchini ribbons and mix until all the parsley are even distributed.

Add the slices of cheese and mix again.

Serve cold.

Curiosity Corner 101314Did you know that parsley is a good source of vitamin K? Moreover, parsley contains more iron than spinach and more vitamin C than orange. So parsley is more than a decorative herb… go ahead and feel free to add parsley to your next dish.

Thank you for visiting Color Your Recipes…have a colorful week!